Showing posts with label Recipes. Show all posts

11.14.2011

New Launch


While I love fashion and design, and working on Lime & Meadow has been a great motivator to stay involved in that world, I've decided that a more focused outlet for my passions is in order. Hence, my husband and I recently launched a new blog devoted entirely to our photography and original recipes. The fashion/design element has disappeared, but I think you will find that the greater effort in the food/photography realm more than compensates. The blog is young, but it has already helped fuel my creativity and forced me to take my favorite hobby (which someday I hope will turn into a career) more seriously. I hope you will check it out, and if you enjoy it, please consider becoming a follower. Its also great to get feedback and see what people do and don't like.....this will help me continue to improve the blog and give YOU even better content, so thank you for your comments!


Thanks for your support!

10.31.2011

End of Summer Recipes: Pickled Jalapenos


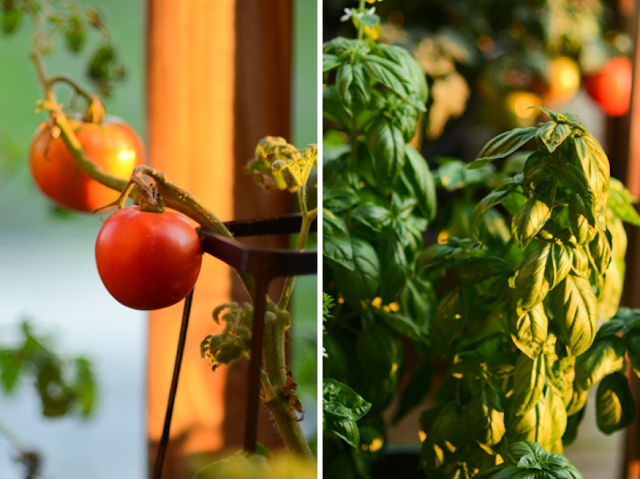
This year was our first time to have our own garden. After moving into our first apartment with a porch (and a sunny one at that!) we decided to make use of the space and filled our little bit of the outdoors with tomatoes, jalapenos, eggplant, green peppers, basil, sage, and rosemary. We got food from all of them, but the jalapenos were really the superstars. As of 2 weeks ago, our two plants were heavy with little peppers. Towards the end of the summer, many of them even grew in red instead of green, which made a really beautiful assortment. Knowing there was no way our palates could sustain all of that capsaicin before the peppers went bad, I, of course, set about pickling them with carrots (just like they're served at our favorite Mexican place). This recipe doesn't call for the typical canning procedure to ensure they're preserved, but from what I've read online they should last for 1-2 months in the fridge.


Ingredients
2 pints jalapenos
3 carrots, sliced 1/4" thick 
1/2 cup apple cider vinegar
1/2 cup white vinegar
1 cup water
1 tbsp peppercorns
2 bay leaves
3 cloves of garlic, lightly pounded
2 tbsp coarse sea salt
1 tbsp sugar

Directions
  1. Pack the jalapeƱos and carrots in a glass jar.
  2. In a saucepan, add the rest of the ingredients and simmer for about 5 minutes.
  3. Pour the hot pickling liquid over the jalapeƱos and screw on lid. Let cool on the counter until able to be handled.
  4. Store pickles in the fridge until ready to eat. For a crunchy bite, you can start nibbling on them within a few hours. As for softer texture, let this sit for 4-5 days.
Recipe adapted from here. Happy Halloween!

10.25.2011

End of Summer Recipes

Although we're planted solidly in the middle of fall here in Chicago, for the next couple of weeks I'll be posting "End of Summer Recipes". For me they are "end of summer" because they mark the last harvest from our porch garden. Our basil stuck it out as long as possible, but at last I had to trim him back and bring him inside for the winter. So what to do with the last of the summer's basil? Make bruschetta, of course. I used grape tomatoes here because I love their sweet flavor.

Ingredients
1 baguette, sliced into 1/2" thick rounds
1 pint grape tomatoes
3-4 sprigs fresh basil leaves, chopped
5 oz. semisoft goat cheese
1-2 tblsp extra virgin olive oil
1 tblsp balsamic vinegar
1 clove garlic, finely sliced
2 tblsp butter

Chop the grape tomatoes into quarters, then toss with olive oil and vinegar. Add chopped fresh basil and salt and pepper to taste. While the tomatoes are marinating, prepare garlic butter by sauteeing butter with sliced garlic over low heat in a shallow pan for 3-4 minutes. Remove garlic slices and brush the baguette rounds with garlic butter using a pastry brush. Spread each slice with goat cheese, then bake in an oven set to 350 degrees until the baguette just begins to turn golden. Remove from oven and top with the tomato mixture. Serve warm and enjoy with friends.


Farewell little garden!

5.07.2011

Gorgonzola Gnocchi

Since moving to New York I've been exploring Italian food a lot more. I was never a big fan before, but New York's amazing Italian cuisine has converted me. And what's more Italian than making your own pasta?

But before we dive in, I should give you a heads up: if you've never made your own gnocchi before, it can be a challenge. The recipe I used from online was rife with comments about the difficulty of finding the right balance of wet and dry in the gnocchi dough. I, too, had problems finding this balance. Like a lot of flour-based recipes, I think making gnocchi successfully involves some trial and error. But despite this challenge, this is a recipe I will definitely try again--the allure of being able to make homemade pasta is simply too great for me to be deterred after just one try. Of course, if you're looking for a fool-proof recipe, you can just buy gnocchi from the store. The gorgonzola sauce is both easy to make and delicious, so no fears there!

  • 2 1/2 lbs potatos
  • 3 cups flour (roughly)
  • 1 egg
  • 1 tsp salt
  • 1/2 tsp ground black pepper
  • 1/4 tsp nutmeg
  • butter
  • 3/4 lbs gorgonzola dolce (ie, creamy gorgonzola)
  • 1 cup heavy cream
  • 4 tblsp chopped fresh herbs, such as chives or parsley

Pierce potatoes several times with fork. Microwave until tender, turning once, about 16 minutes total. Cut potatoes in half lengthwise and scoop potato flesh into a large bowl. Mash the potatoes until smooth. Mix the egg into the potatoes. Sift flour, salt, pepper, and nutmeg over potato mixture, then stir to combine. Knead gently. Divide dough into 8 pieces. Roll each piece on work surface into a 1/2-inch-diameter rope. Cut dough into 1-inch lengths and make grooves in each piece with fork (if you can do this without smashing them--I couldn't. Try a gnocchi board instead). Now is where a little bit of intuition and experience go a long way: we found that the gnocchi dough should be dry enough that when you slice it with a knife, it doesn't stick to the knife or the countertop. If your dough is still sticky, add more flour and roll it out again. Repeat this until you achieve the right consistency. Finally, bring a large pot of salted water to boil. Add the gnocchi and boil until the gnocchi rise to the surface. Boil 1-2 minutes more. Drain gnocchi in a collander. Heat 2 tblsp butter in a frying pan over medium heat and fry the gnocchi, in batches, until it turns golden-brown.


For the sauce, bring the heavy cream to a boil, stirring occasionally. Add the gorgonzola and stir until the gorgonzola is melted. (see, isn't that easy?) Toss the gnocchi in the sauce and top with a tablespoon of the fresh herbs. Enjoy!

Recipe adapted from here.

4.24.2011

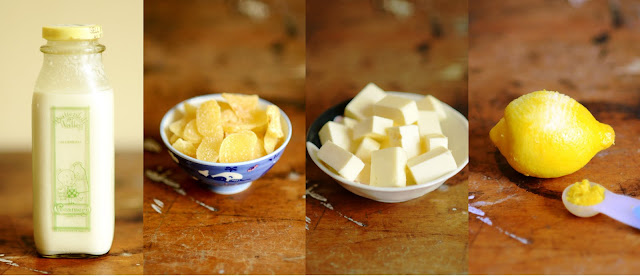
Ginger Cream Scones

I normally prefer cooking to baking, but with leftover heavy cream and buttermilk from last week's pancakes, I knew I needed to find some baked goods to make. I'm planning to make some buttermilk biscuits with the buttermilk (future post maybe?), and the heavy cream went towards these delicious ginger scones. This post is light on the photos, partly because flour-y things don't make for the most beautiful pictures, and partly because I felt that kneading a heap of wet dough and taking photos at the same time wouldn't turn out so well for my camera.

So let's get started!


  • 1 1/4 cups unbleached all-purpose flour
  • 1 cup cake flour
  • 1/3 cup granulated sugar
  • 1 tablespoon baking powder
  • 1 teaspoon finely chopped lemon zest (about 1/2 lemon)
  • 1 1/2 sticks (6 ounces) unsalted butter, cut into 1-inch cubes and frozen
  • 4 1/2 ounces candied ginger, finely chopped into 1/4-inch pieces to equal 2/3 cup
  • 3/4 cup heavy cream, plus extra for brushing the tops of the scones

Adjust the oven rack to the middle position and preheat the oven to 400 F. 

In the bowl of a food processor fitted with the steel blade or in the bowl of an electric mixer fitted with the paddle attachment, combine the flour, sugar, and baking powder, and pulse or mix on low to incorporate. Add the lemon zest and butter, and pulse on and off, or mix on low, until the mixture is pale yellow and the consistency of fine meal.

Transfer the mixture to a large bowl and stir in the ginger. Make a well in the center and pour in the cream. Using one hand, draw in the dry ingredients, mixing until just combined. (This whole one hand bit is key--you'll want that other hand armed with a fork to scrape the dough off of your mixing hand!)

Wash and dry your hands and dust them with flour. Turn the dough out onto a lightly floured work surface and gently knead a few times to gather it into a ball. Pat the dough into a circle about 1 inch thick. Slice (like a pie) into 6-8 triangles. Place the scones 1 inch apart on a buttered baking sheet. Brush the tops with cream. 

Bake for 15 to 20 minutes, until the surface cracks and they are slightly browned. 


Ok, so not the most beautiful presentation ever.....but they are without a doubt the most buttery, flaky scones I've ever made. Fit for a bakery!

Recipe adapted from here.

4.17.2011

Blueberry Buttermilk Pancakes with Maple Whipped Cream

Pancakes don't have a reputation for being the most exciting of foods: they are a staple, a classic, something you whip together with ingredients on hand on a slow Sunday morning. But if you put just a little extra effort into pancakes, they are exciting--and they can be transformed into a delicious (even gourmet!) meal without losing any of their down-home appeal.

You might need to make a trip to the store for this recipe, so let's review our ingredients:


1 1/2 c. all-purpose flour
2 tblsp sugar
1 1/2 tsp baking powder
1/2 tsp baking soda
1/2 tsp salt
1 1/2 c. buttermilk
2 eggs
1 tsp vanilla extract
4 tblsp butter, melted
3/4 cup heavy cream
2 tblsp maple syrup, plus more for topping
9 oz blueberries

We'll make the maple whipped cream first:


Pour the 3/4 cup heavy cream into a bowl and add 2 tblsp maple syrup. Beat, using an electric mixer on the highest speed, until the cream becomes thick and fluffy. Place in the fridge while you prepare the pancakes.


Sift together the flour, sugar, baking powder, baking soda, and salt in a large bowl. In a separate bowl, mix together the buttermilk, eggs, butter, and vanilla. Add the wet ingredients to the dry ingredients and blend. Once blended, add almost all the blueberries, saving just a few for the topping. Mix together.


You already know this part: heat a pan over medium heat. The pan is at the perfect heat when a slice of butter added to the pan sizzles but doesn't burn. Scoop 1/4 cups of batter into the pan and cook until little bubbles start to form on the top of the batter. Flip and cook until the other side is golden.

Now we've come to the best part: arrange your pancakes the way you like them best (stacked? staggered?), then top with a generous dollop of the maple whipped cream, maple syrup, and fresh blueberries.


Enjoy your delicious breakfast!

Buttermilk pancake recipe from Joy of Cooking

4.11.2011

Beer Battered Chile Relleno with Chipotle Cream Sauce and Jalapeno Corn Relish

This recipe was inspired partly by the microbrewery culture in the northeast, and partly by our Texas roots. One of the best parts of this recipe is drinking beer while you make it! But just a warning: the chipotle sauce and jalapeno corn relish are SPICY. To tone it down, try adding less chipotle and less jalapeno. Or if you love the heat, keep it as is!

First, assemble your ingredients (serves 2):


1 plum tomato
2 jalapenos
1 ear of corn
juice of 1/2 lime
4 poblano peppers
6 oz. white cheese
1 small onion
14 oz can fire roasted diced tomatoes, drained
6 oz. can chipotle peppers in adobo sauce
1 c. heavy cream
3/4 cup beer (we used Hebrew Genesis Ale--one of my favorites!)
1 1/4 c.all-purpose  flour
1/2 c. milk
2 eggs
2 tsp salt
1 tsp baking powder

Start with the corn relish, which you can prepare and put aside while the rest is cooking:


Boil the corn then rinse with cold water to cool. Finely chop the tomatoes, jalapenos, and corn, then sprinkle with the lime juice and mix. Refrigerate while you prepare the rest of the recipe.


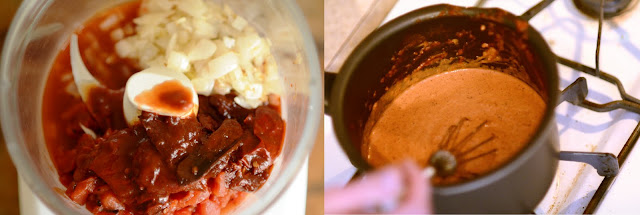
For the sauce, finely chop the onion and sautee over medium-low heat until cooked through and translucent. Add the onion, chipotles in adobo sauce, and drained tomatoes to a food processor. Process until blended, then add 1 cup to a pan (you will have some leftover). With the pan set over low heat, add 1 cup heavy cream to the 1 cup of tomato/chipotle mixture. Whisk to blend and bring to a simmer, then reduce heat to low.


Now we've come to the heart of the recipe: the chiles! Broil the poblanos by setting 5-6" under the flame of your oven's broiler, with the broiler set to 525 F. Broil 4-5 minutes on each side, until skin just begins to blacken but the pepper is still firm. Dunk chiles in cold water to loosen the skins, then peel off by hand. Cut a slit from the top of the chile to 3/4 of the way down. Remove the seeds of the pepper through the slit, being careful not to tear the chile. Fill each pepper with cubes of the white cheese. Prepare the batter by mixing together the beer, flour, eggs, milk, salt, and baking powder. Dip the chiles in the batter and let stand 30 minutes. Once you're ready to cook the chiles, heat several tablespoons of vegetable oil over medium-high heat in a large frying pan. Place the batter-coated chiles in the pan and cook a 3-5 minutes on each side, until the batter turns golden and the cheese begins to melt. Remove chiles from the pan and top with the chipotle cream sauce and jalapeno corn relish. We accompanied ours with black beans and, of course, beer!


4.03.2011

Cheeseless Tuscan Pizza with Roasted Red Pepper, Olive Tapenade and Caramelized Onion


Let me preface this with a confession: I was nervous about this pizza. My Saturday morning started with a huge fail on the baking front. I diligently got out of bed and headed straight to the kitchen to make some banana nut muffins, only to be rewarded an hour later with some burned shells surrounding an un-cooked core. I still don’t know what went wrong (I made the same muffins last weekend and they were fabulous!) but I suspected my oven. On top of that, I’ve never before made a pizza, and it seemed risky to start off with the cheeseless variety. Nonetheless, I was inspired by the vegan pizza selection at Whole Foods to take a stab at my own creation.....and my adventure was rewarded, because this pizza was delicious.

So let’s get started! Ingredients:

16 oz pizza dough
1 cup mixed black and kalamata olives
2 tblsp capers
2 tblsp chopped fresh parsley
1 tblsp lemon juice
1 large sweet onion
1 large red pepper

Prepare the white bean dip ahead of time following recipe at this link. This will be used as the "sauce" for our pizza.  I substituted 3 cloves roasted garlic for the 2 fresh cloves, for a milder taste, and added 1 tblsp whole black peppercorns before processing in the food processor. Also, make sure you drain the beans very well before you blend, or your dip will turn out runny!

Now before doing anything else, we need to start caramelizing the onion (this takes 1.5 hrs). 

Coarsely chop the sweet onion. Add 1 tblsp butter and 1 tblsp olive oil to a pan set over the lowest heat setting possible (yes, the lowest). Sautee the onion for 1 hour over very low heat, until the onions are wilted and yellow. Do not allow the onions to brown yet! After 1 hour turn up the heat to medium-low and sautee for an additional 20 min. This stage is when the onions begin to caramelize and turn brown. You can add a couple tblsp of white wine, which will help the caramelization process.

While the onions are cooking prepare the olive tapenade and roasted red pepper.

Put the olives, capers, parsley and lemon juice into a food processor. Process for just a few seconds at a time, mixing in between, until the ingredients are coarsely chopped and blended.  For the red pepper, place in a baking dish set 5-6" below your oven's broiling flame. Broil at 525 F, turning periodically, until blackened on all sides. 

Now for the assembly: 

Preheat the oven to 500 F. Split the 16 oz pizza dough into 2 equally sized balls and set one aside to use later. Brush the remaining dough with olive oil and roll out to 10-12" round. Spread the white bean dip in a thin layer on top of the dough, then top with the toppings that you prepared. Bake for 10 minutes.


Now doesn't that look delicious? Enjoy!

3.28.2011

Eggs Florentine with Smoked Paprika Hollandaise

There are two reasons I've traditionally avoided eggs benedict: 1) I'm vegetarian, and they usually incorporate some sort of meat product, and 2) the sickly pale yellow-ness of hollandaise sauce just never really turned me on. But world, rejoice! With this recipe I've solved both of those problems.

First, you will need to assemble your ingredients (this recipe serves 1):

1 english muffin (I used wheat)
5 cups fresh spinach
2 tblsp vegetable oil
4 cups water
1/4 cup white vinegar
2 eggs
1 egg yolk
1/4 cup butter, chopped
1 tsp smoked paprika
fresh lemon juice

Now let's get cooking! First, we'll need to poach the eggs:

Bring the 4 cups water and 1/4 cup vinegar to a boil. Crack each egg individually into a bowl, then slide carefully, one at a time, into the boiling water. The vinegar is a crucial ingredient here, and is what keeps your egg together in one nice piece! Boil for 3 minutes then remove with a slotted spoon. Drain on a paper towl, and keep water boiling while we make the hollandaise and cook the spinach:

Put your egg yolk in a heatproof bowl and place the bowl over (but not touching) some simmering water. Make sure the bowl doesn't get too hot, or your yolk will cook! Whisk the yolk rapidly for 1 minute or so, until it gets fluffier and lighter in color. Add the butter pieces and continue whisking as they melt. Remove from heat and add smoked paprika and lemon juice to taste. That's it! To cook the spinach, first heat 2 tblsp vegetable oil over medium-low heat. Add the spinach and sautee until the leaves are wilted.

Now we can assemble things!

This is easy. Toast the english muffin and top with the sauteed spinach. If your poached eggs are cold, slide them back into the boiling water for 30 sec to heat through. Put the eggs on top of the spinach.

Now spoon the hollandaise sauce over the tops of the eggs. Add cracked black pepper and salt to taste.
Just one more step.....

Enjoy!